

How do I prime my Coolubricator™ and Serv-O-Spray™ pumps?
It may be necessary to prime a pump on a new system or if it has been run dry or removed for service. Normally priming a pump is a simple process, but it can sometimes be troublesome on systems, especially when there are multiple pumps in a stack.
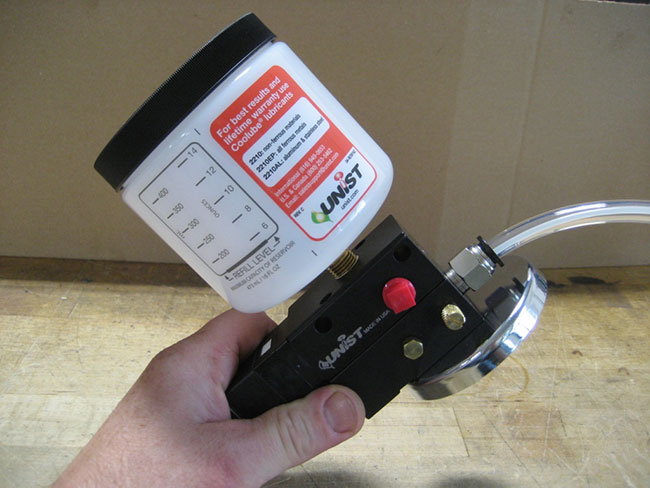
The first step in priming a pump or pump stack is to ensure that the reservoir or air trap that supplies fluid to the pump(s) has an adequate fluid level in it, and that fluid is indeed getting to the pump(s). For information on working with an air trap see How do I setup and maintain my air trap?. In a standard Coolubricator™and Serv-O-Spray™system, the bottom pump in the pump stack will have a brass bleeder screw on the front of the pump block.
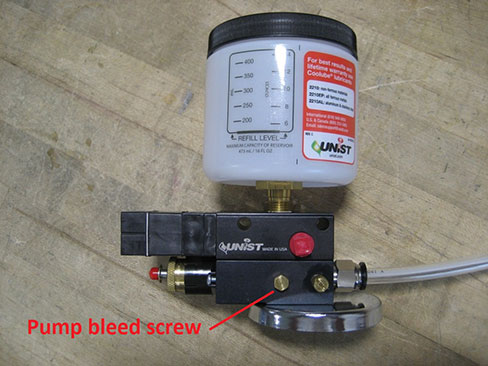
Typically, loosening this screw 1-2 turns and ensuring clear fluid (with no air bubbles) flows from the port is enough to fill the fluid chamber in each pump with fluid so it can begin pumping. Note: the screw does not need to be completely removed, and do not overtighten the screw or it can break. Be cautious on pressure fed systems as fluid in the stack is under pressure and can spray out from the bleed screw once loosened. Next, cycle the pump(s) and observe for fluid in the capillary tube. It may take several cycles for the outlet check valve housing in the pump to fill with fluid before it can be seen in the capillary tube connected to the pump. When the pump first begins to dispense fluid, there will be a mixture of fluid and air pockets in the capillary.
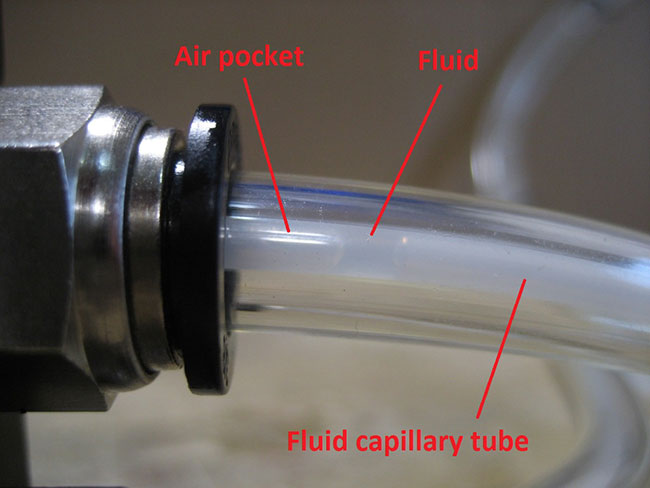
Once the pump begins pumping fluid, it will need to be cycled multiple times to fill the capillary tube on coax systems. Note that no fluid will be dispensed from the nozzle until the capillary tube has filled with fluid. Do not completely fill the outlet tube on a single line system, as that will lead to initial over-application of fluid.
If the pump does not begin pumping fluid, it may be necessary to open the pump bleed screw again to cycle more fluid through the pump stack. It can also be helpful to cycle the pump while the bleed screw is open.
Other things that can help with a pump that will not pump fluid:
- Try cycling the pumps at some other frequencies. Increase and then decrease the cycle rate of the pump (on Coolubricator™systems where the pump is controlled by a pulse generator). Do this several times leaving it at high and low cycle rates for 10-15 seconds at a time.
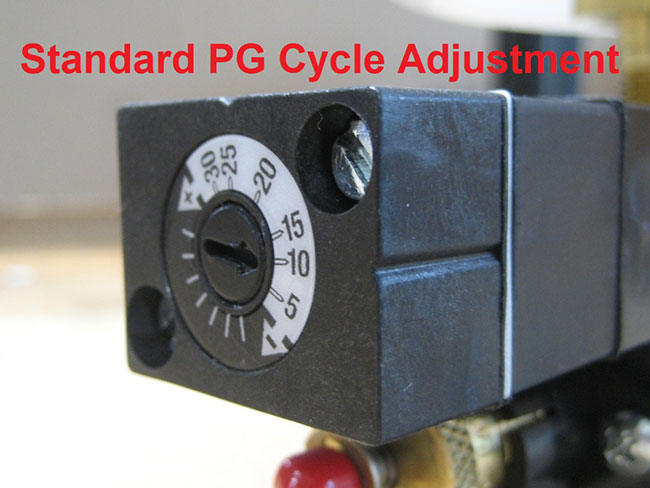
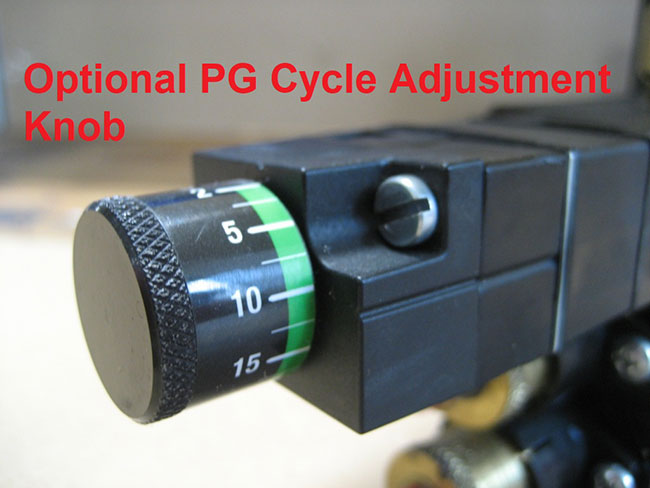
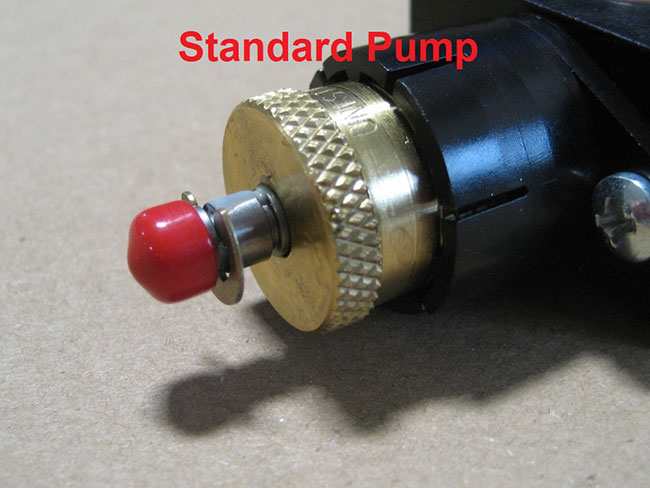
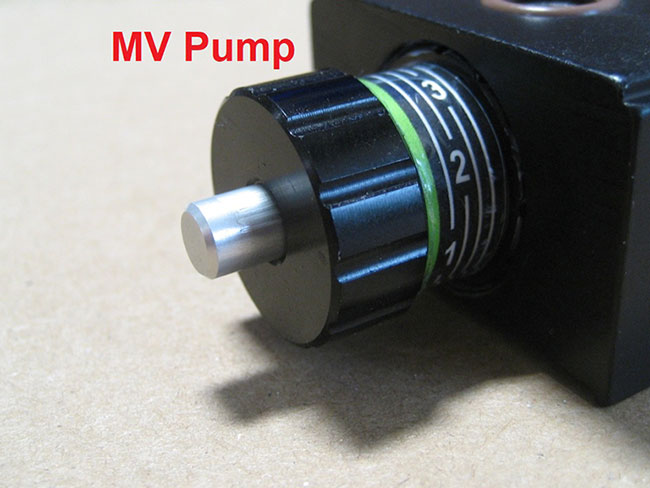
- Try cycling the pumps at different stroke lengths. While the pump is running at a lower cycle rate (20-30 cycles per minute), screw the stroke adjustment knob all the way out for standard style pumps (brass adjustment knob) and then all the way back in, or all the way in for MV style pumps (black anodized aluminum adjustment knob) and then all the way back out.
- Tilt the pumps so the outlet of the pump is angled up. This can help the pump to push any air pockets out of the fluid chamber in the pump. Ensure that there is enough fluid in the reservoir while doing this so the pump stack is still supplied with fluid while it is tilted.
For pump stacks with multiple pumps, it may take several attempts at opening and closing the bleed screw to properly fill the entire pump stack with fluid. It can also be beneficial to work from the bottom pump up to the top. As you get a pump pumping fluid, turn the adjustment knob all the way out (brass adjustment knob) or all the way in (black anodized adjustment knob) to prevent that pump from stroking and move on the to the next pump. You can also turn the stroke down on all the pumps so only one pump is stroking at a time and work on one pump at a time. Eventually, as you get all of the pumps running, you can adjust them back to full stroke and they should all continue to pump fluid.