
How to change roller covers on a Uni-Roller® Type-S
See the related video for instructions on how to change your Type-S roller covers, or you can follow the steps below.
Remove the Upper Roller Carrier
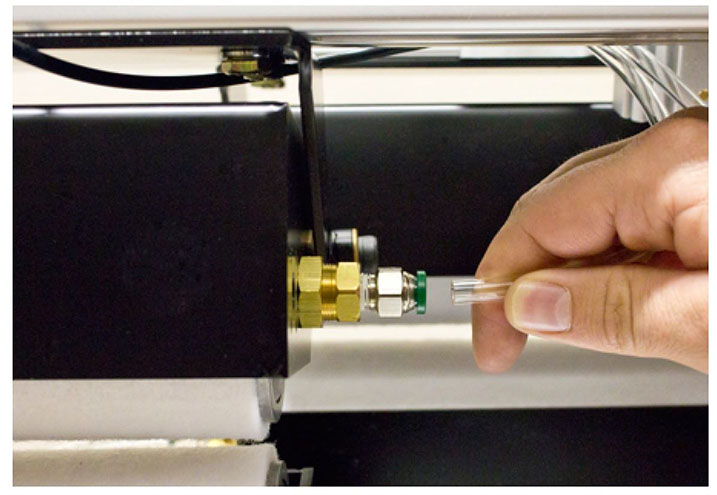
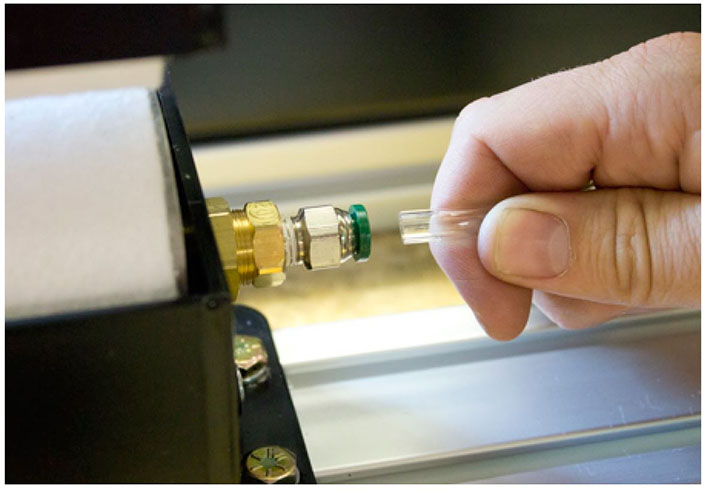
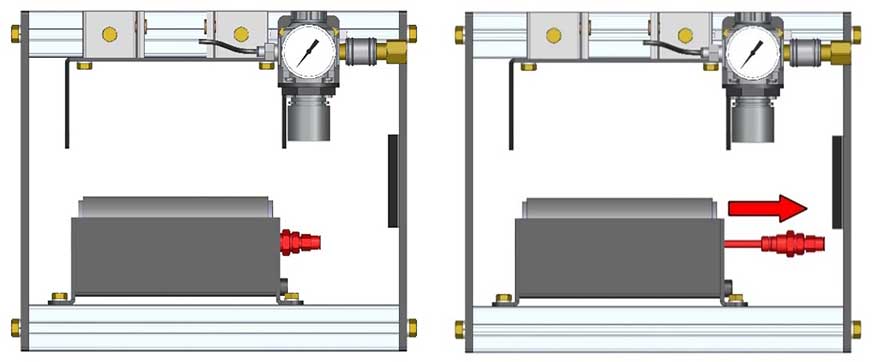
- Remove the tubing from the push-to-connect fitting on the dispenser tube.
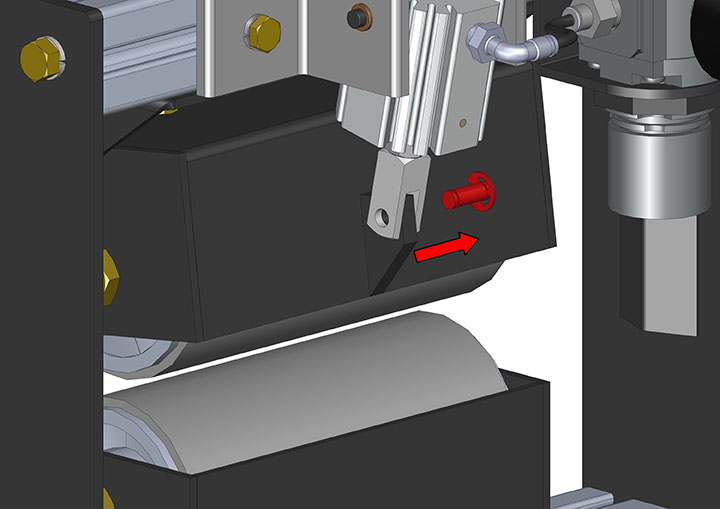
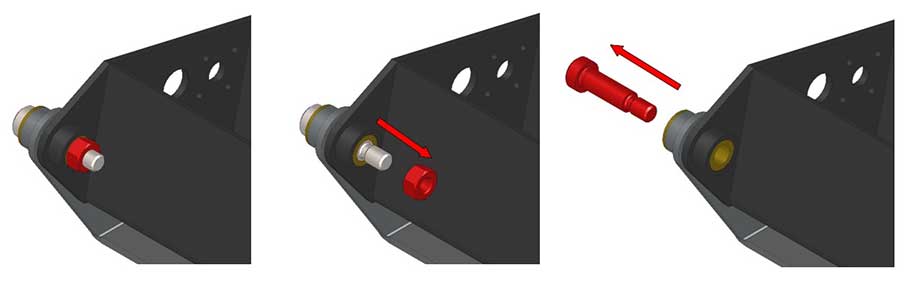
- Remove one of the E-clips on the piston clevis rod pin.
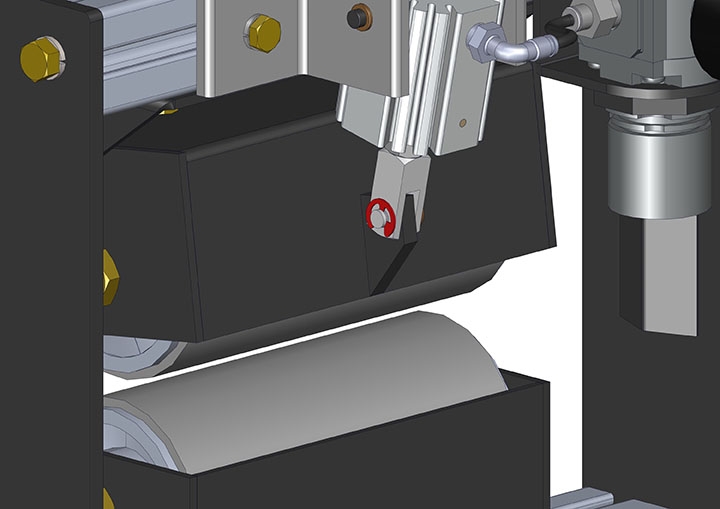

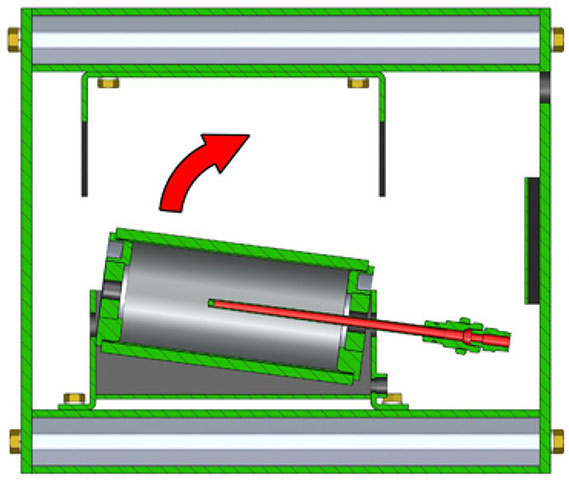
- Remove the piston rod clevis pin. Rotate the air cylinder up out of the way.
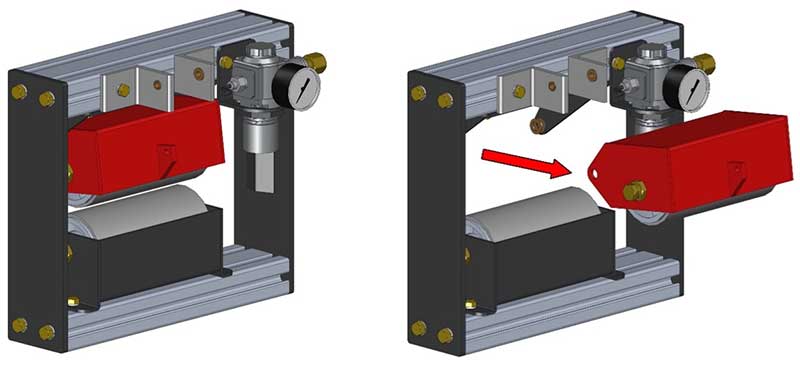
- Remove pivot pins or bolts.
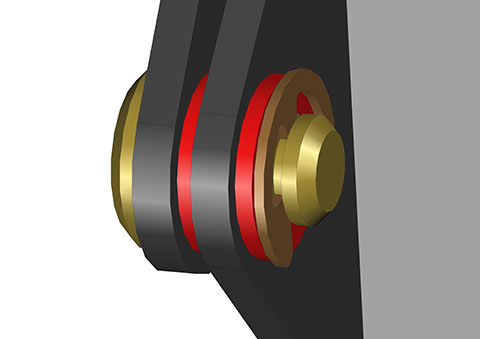
Standard version: Remove the pivot pins, taking care to also remove the brass washers.HD version: Remove the pivot bolts from the pivot bushings.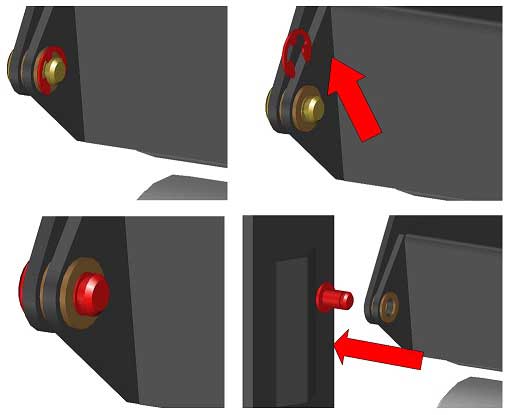
- Removed the upper roller carrier assembly and carefully set aside.
Note: On multiple roller set units, take care to note which upper roller carrier came from each pivot bracket. Not doing so could cause misalignment of the air cylinder upon re-installation and may require loosening of cylinder mounts to re-align the cylinder, and retightening.
Remove the Lower Roller
- Remove the tubing from the push-to-connect fitting on the dispenser tube.
- Loosen jam nut on the stub shaft and thread it completely out of the roller carrier assembly and set aside.
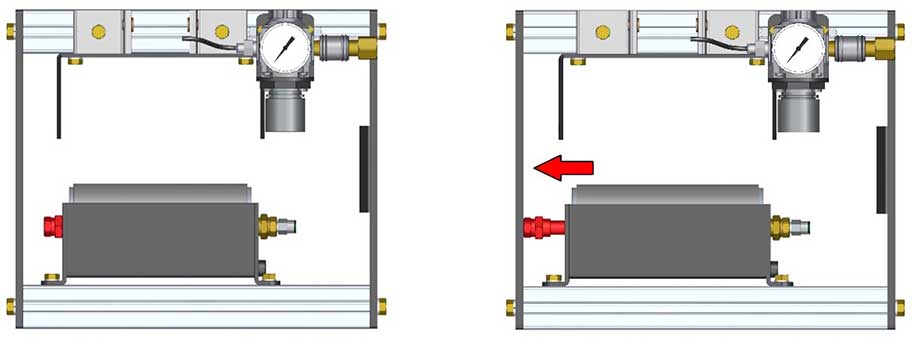
- Loosen jam nut on the dispenser tube assembly and thread it out of the roller carrier. carefully remove it completely from the roller and set aside.
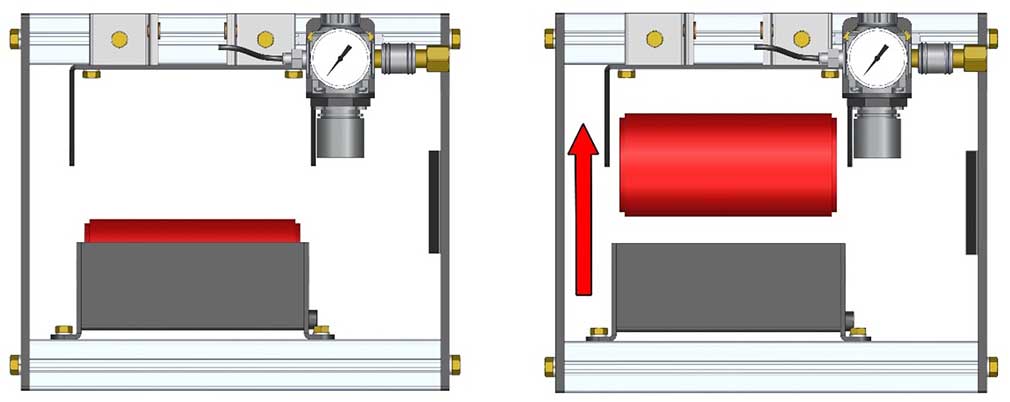
- On some single roller set units, it may be necessary to partially slide the dispenser tube tube assembly out of the roller, slightly tip the roller assembly up and to the side and then fully remove the dispenser tube assembly. This method helps to avoid interference with the end plate when removing the dispenser tube.
- Remove the roller from the roller carrier assembly.
Endcap and Bearing Replacement
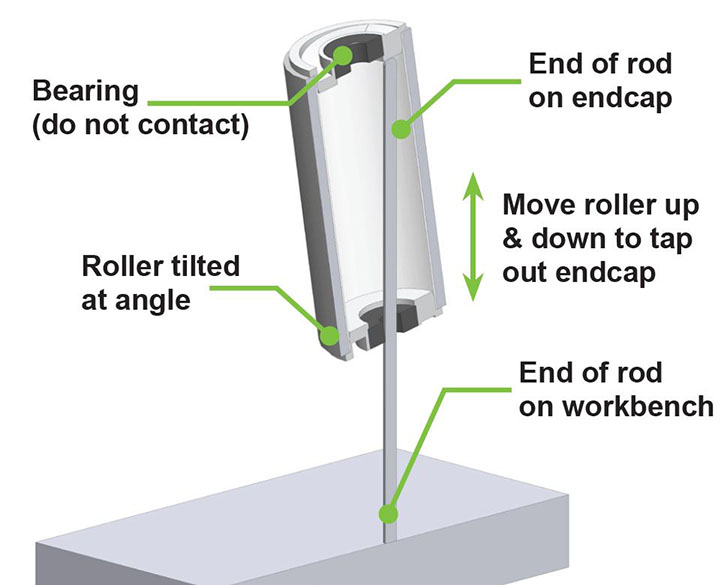
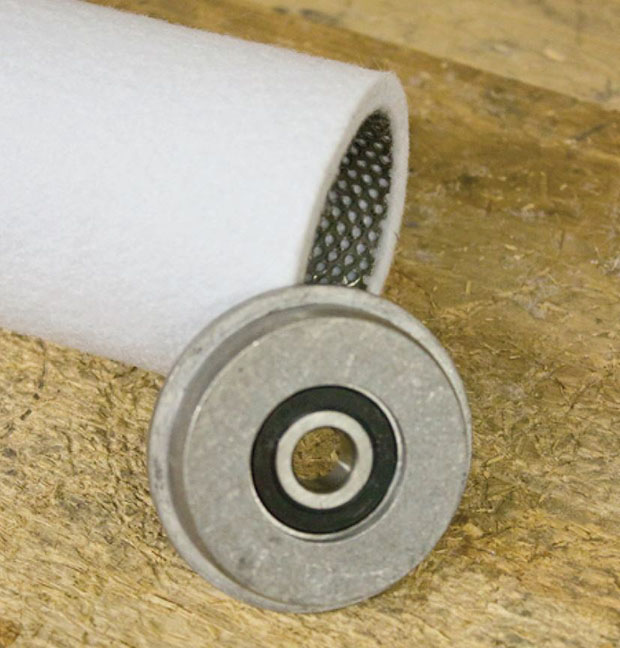
With the roller assembly removed as outlined above, remove each roller endcap by inserting a wooden or brass dowel into the roller assembly, positioning one end so that it is contacting the inside surface of the opposite roller end. Be sure the dowel is not contacting the bearing.
Place the exposed end of the dowel or rod onto a work bench and carefully move the roller up and down, tapping on the inside surface of the top endcap, being careful to keep the roller tilted at an angle so that the bearing is not damaged. This process can be repeated to remove the other endcap.
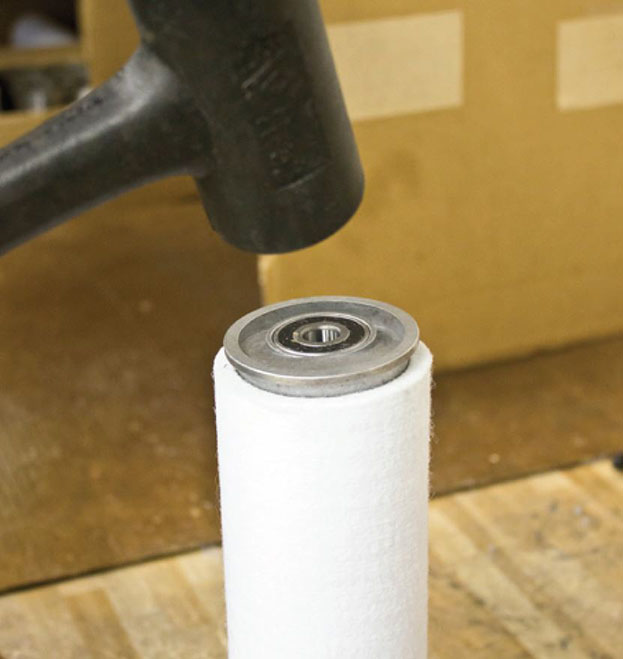
Insert the roller endcaps into the new roller/perforated tube assembly and gently tap them into position with a soft face hammer, ensuring that they are fully seated against the perforated tube.
Replace or Clean Dispenser Tubes
To ensure proper fluid delivery, the dispenser tubes inside of the rollers must be clean and free of debris. Occasional inspection, cleaning, and replacing is required. The dispenser tubes should always be inspected when the roller covers are changed and serviced as needed.
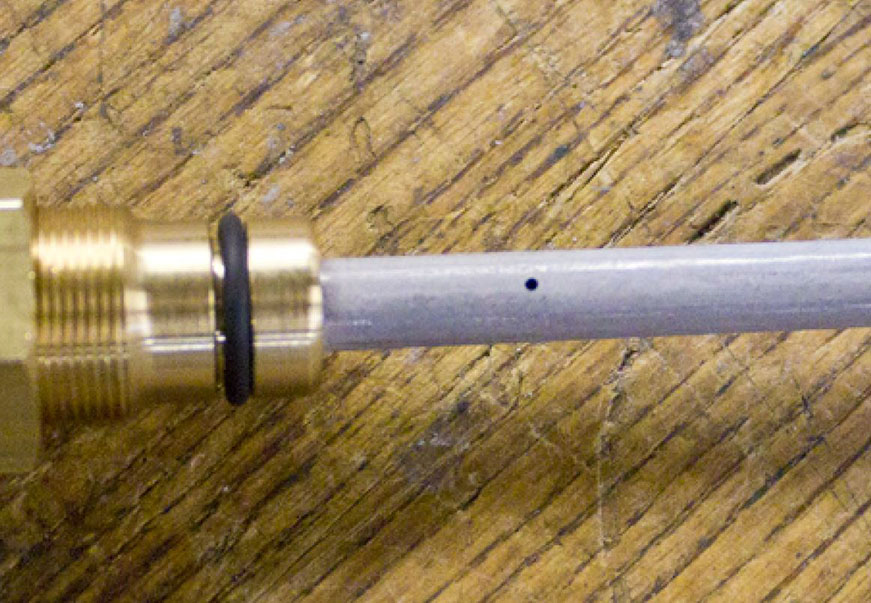
Visually inspect all holes in the dispenser tubes for debris or blockages. Use compressed air to blow out debris and ensure that air is coming out of every hole. If there are blocked holes, replace the dispenser tube.
Reinstall the Rollers into the Roller Carriers
- Position a roller assembly into the lower roller carrier and begin threading in the stub shaft and jam nut assembly.
- Carefully insert the dispenser tube assembly into the roller carrier and thread it into the roller carrier.
- With pressure applied to the roller to push it against the dispenser tube bearing surface, thread the dispenser tube into the assembly until the roller is centered in the carrier assembly.
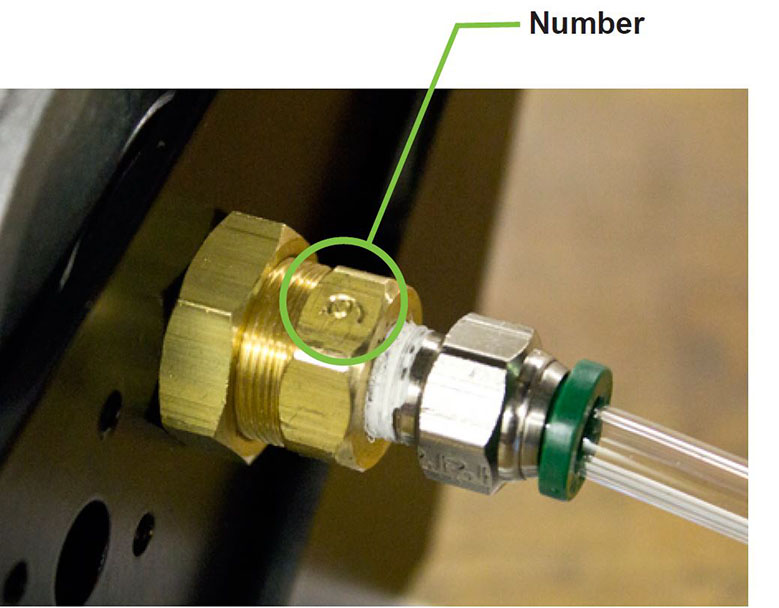
- Turn the dispenser tube assembly so that the stamped number is facing up and tighten the 3/4” brass hex nut.
- Tighten the stub shaft assembly so that the bearing surface just makes contact with the bearing and tighten the jam nut.
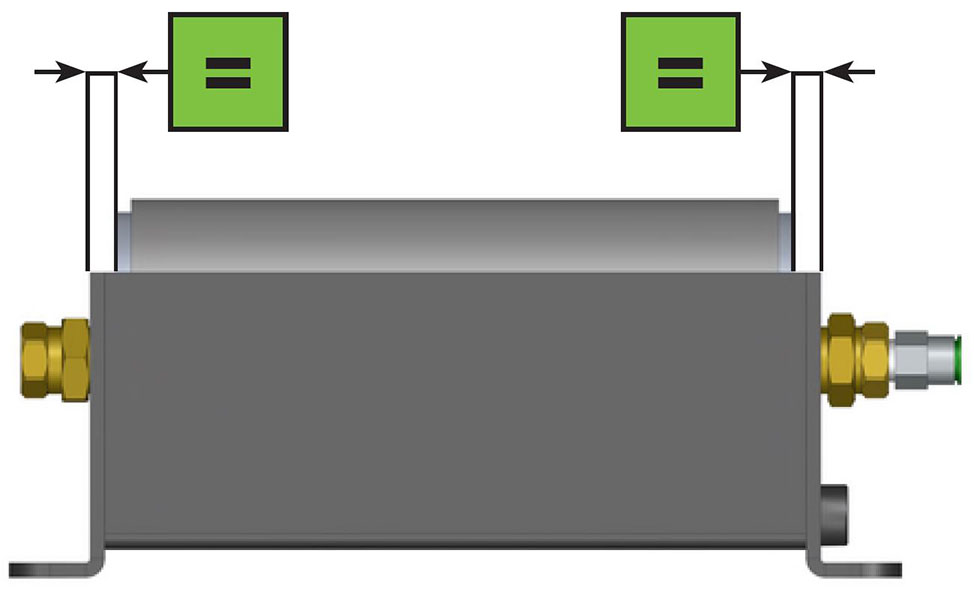
- Ensure the roller is free to rotate, is centered in the roller assembly, and does not have the space to move side to side.
- Repeat the steps above to install a roller into the upper roller carrier, only this time, making sure the numbers on the dispenser tube will face up when installed into the Uni-Roller.
Install the Upper Roller Carrier Assembly
- Position the upper roller carrier assembly into the roller unit and insert the pivot pin or bolt, taking care to ensure proper placement of washers if using the standard version of pivot brackets.
- Install the E-clips on both pivot pins, or the nuts on the shoulder bolts if have HD version.
- Reinstall the rod clevis pin and E-clip on the air cylinder.
- Check for smooth pivoting action and proper alignment with bottom roller.