
How to change roller covers on a Uni-Roller®S2 or Powered Uni-Roller®S2
Uni-Roller®S2
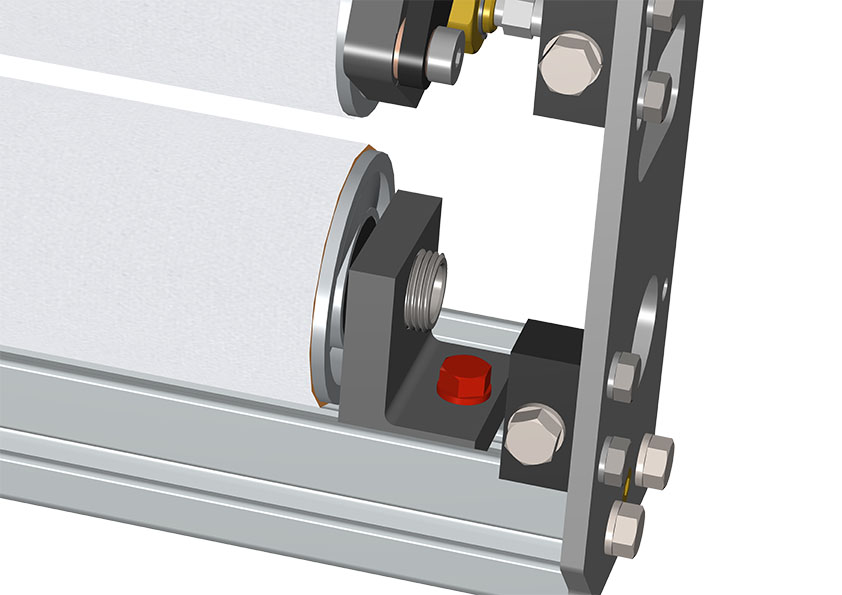
- Loosen the brass jam nut of the stub shaft and dispenser tube with a 1” wrench, then unthread completely. This will start to remove the shaft from the roller bearing shown in the images below.
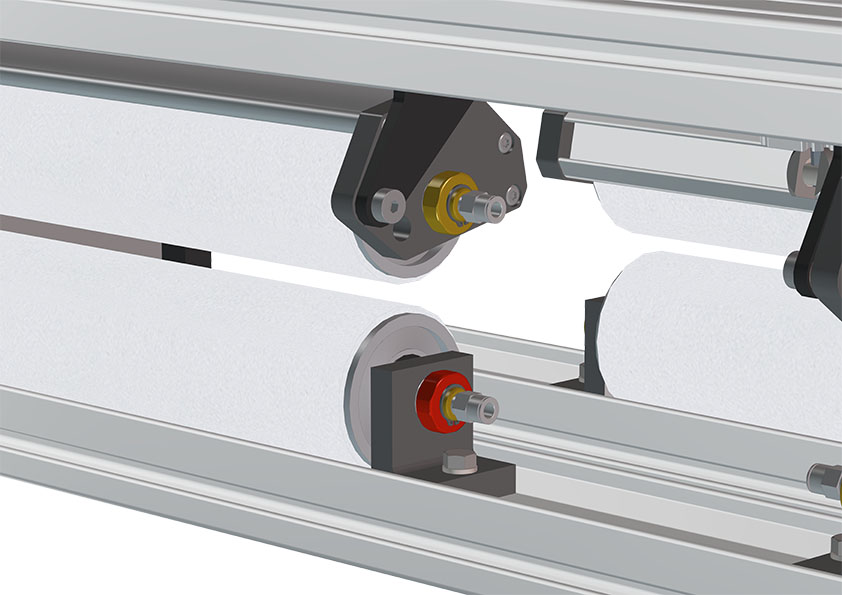

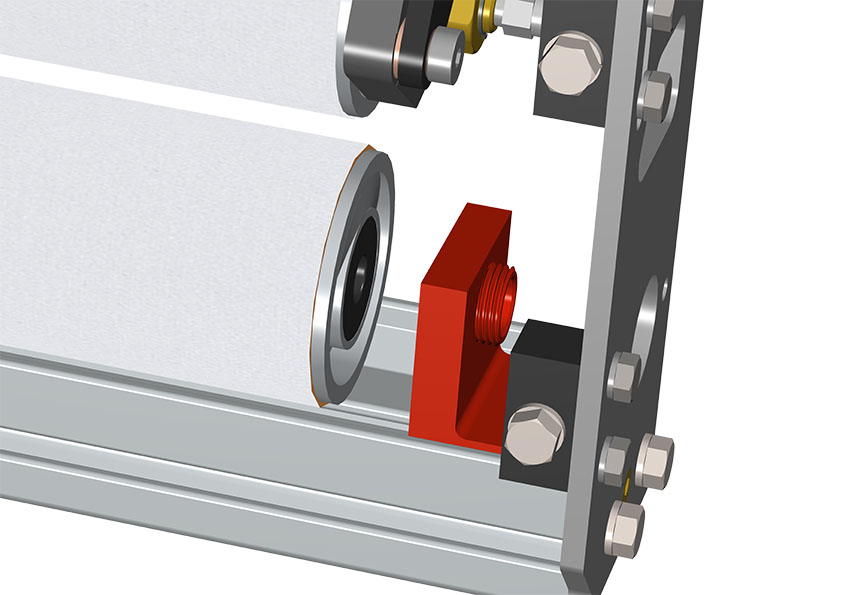
- After unthreading completely, pull the stub shaft and dispenser tube assembly clear of the roller assembly shown below. Because of the O-ring, it may be sticky and require some axial force.
- The roller is now free to be removed.
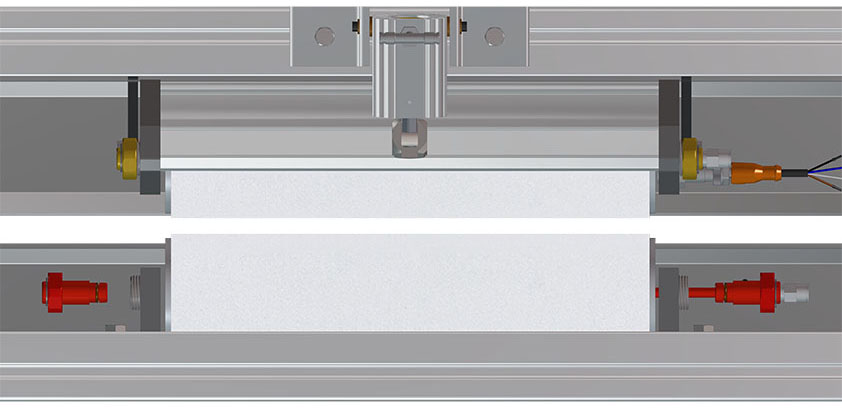
- For the upper roller carrier, repeat the above procedure. The upper roller can be removed without removing the lower one, and vice versa.
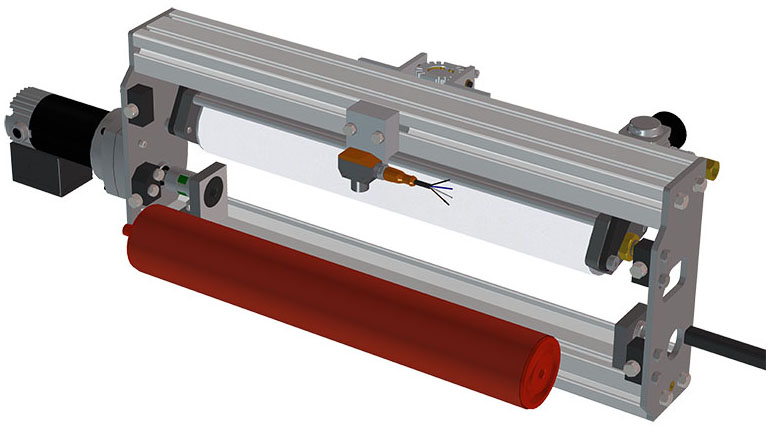
Powered Uni-Roller®S2
The following maintenance procedures are specific to powered units only. (Part number beginning with "P")
Lower Roller Assembly Removal (Single Roller Units)
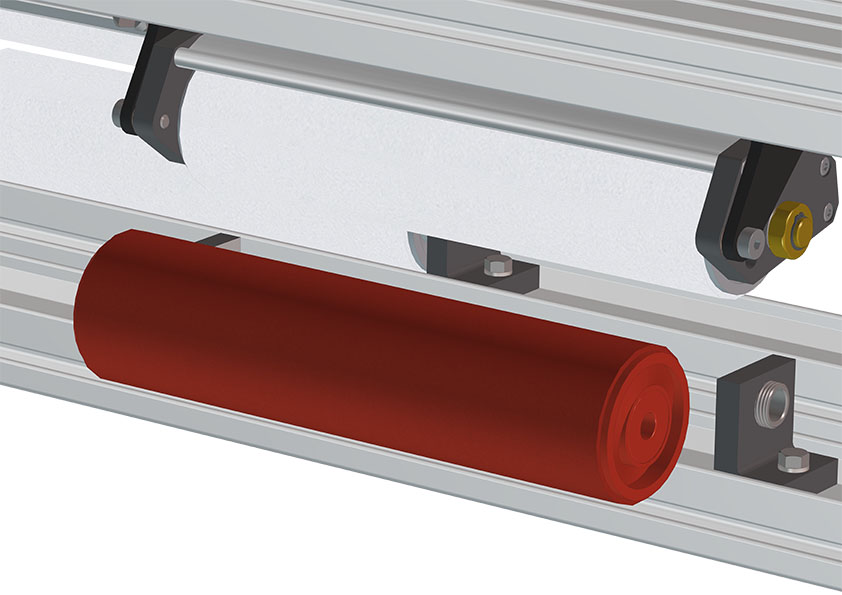
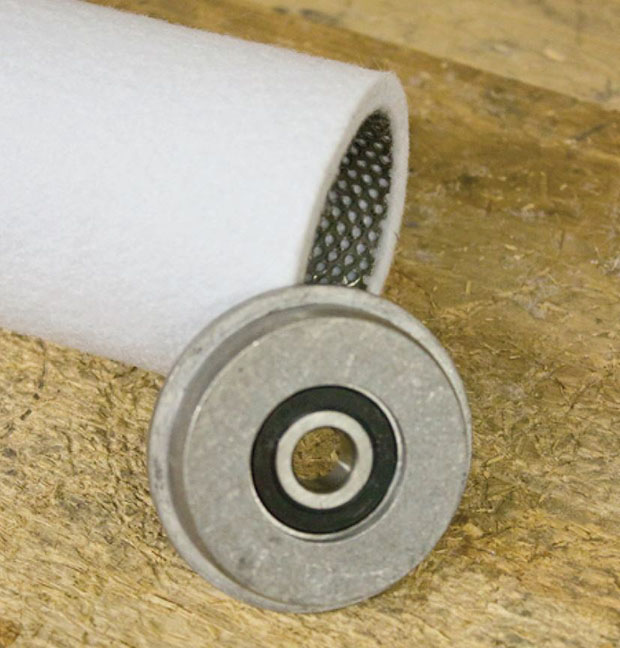
- The lower roller of a powered single roller unit has a shaft integrated into one of the endcaps. To replace the roller cover or endcap bearing, it must be removed from the frame.
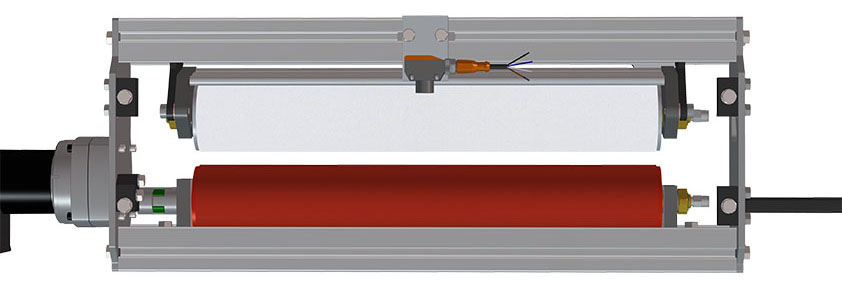
- Begin by removing the dispenser tube, then loosen the 5/16-18 bolt on the lower roller carrier opposite the motor. Slide the lower roller carrier bracket away from the roller.
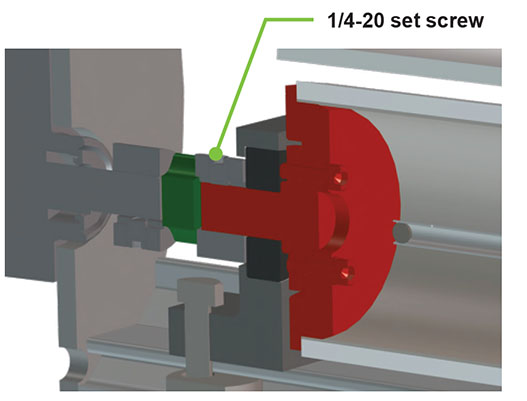
- Next, loosen the 1/4-20 set screw on the shaft coupling with an 1/8” Allen wrench and slide the entire roller assembly away from the motor.
- The lower roller can now be removed.
Lower Roller Assembly Removal (Multiple Roller Units)
- Multiple roller powered units use rollers driven by No. 35 roller chains. To remove the lower roller of a chain powered unit, begin by removing the cotter pin and disconnecting the chain master link.
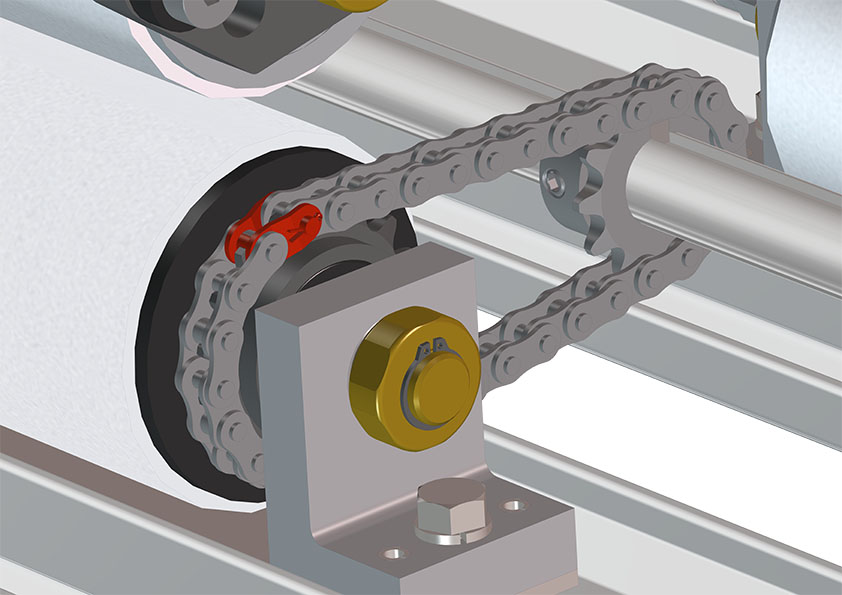
- With the chain removed, remove the stub shaft and dispenser tube. The roller assembly is now able to be removed. Inspect the sprockets for wear. The powered roller endcap, chain assembly, and shaft sprocket are available as replacement parts.
Endcap and Bearing Replacement
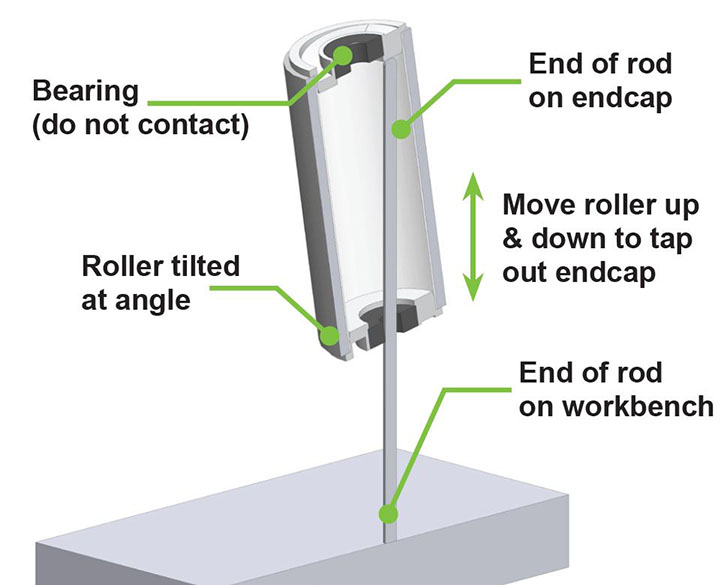
With the roller assembly removed as outlined above, remove each roller endcap by inserting a wooden or brass dowel into the roller assembly, positioning one end so that it is contacting the inside surface of the opposite roller end. Be sure the dowel is not contacting the bearing.
Place the exposed end of the dowel or rod onto a work bench and carefully move the roller up and down, tapping on the inside surface of the top endcap, being careful to keep the roller tilted at an angle so that the bearing is not damaged. This process can be repeated to remove the other endcap.
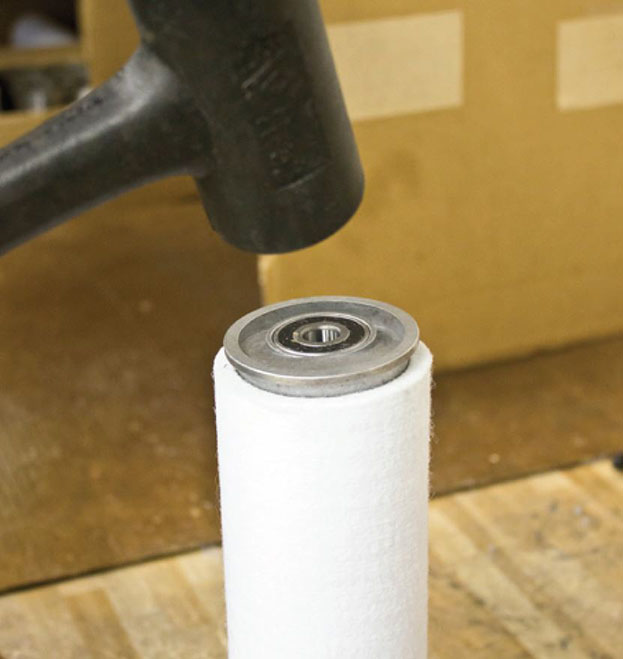
Insert the roller endcaps into the new roller/perforated tube assembly and gently tap them into position with a soft face hammer, ensuring that they are fully seated against the perforated tube.
Replace or Clean Dispenser Tubes
To ensure proper fluid delivery, the dispenser tubes inside of the rollers must be clean and free of debris. Occasional inspection, cleaning, and replacing is required. The dispenser tubes should always be inspected when the roller covers are changed and serviced as needed.
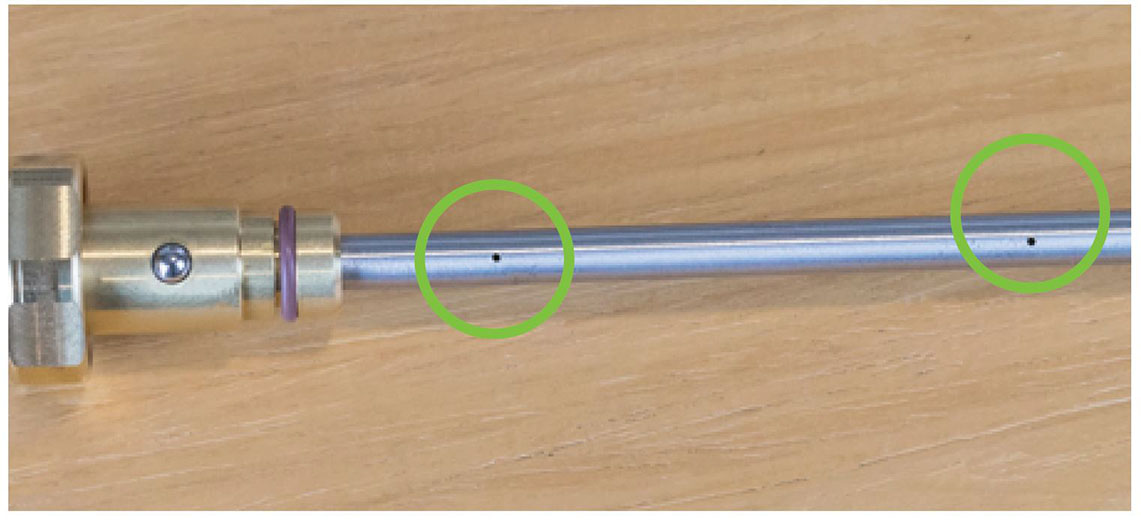
Visually inspect all holes in the dispenser tubes for debris or blockages. Use compressed air to blow out debris and ensure that air is coming out of every hole. If there are blocked holes, replace the dispenser tube.
Reinstallation
Install the new roller assemblies back into the system in the reverse order they were taken out. Important: When reinstalling the stub shaft and dispenser tube, torque the jam nut to 85-in-lbs. A light snug is all that is needed if torque wrench is not available. DO NOT over tighten the jam nut.