How to edit fluid settings on a SmartFlow® controller current job.
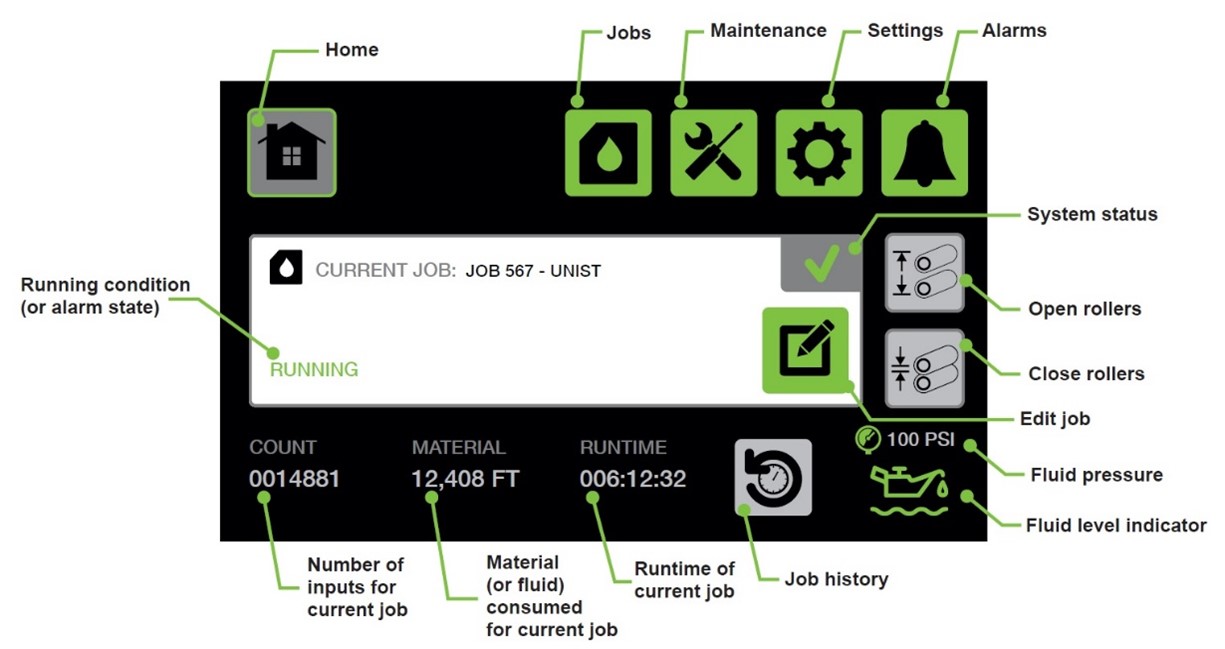
The user can change pertinent job information by pressing the EDIT JOB button. The next screen shows the different categories of settings that can be edited. Details not shown on this screen can be changed through the ENTER JOB SETUP button. This will bring the user back through the job setup, but it will not allow edits to information that is shown on the Job Edit display. If the job only has nozzle outputs, editing the job from the Job View display will bring the user to the beginning of the job setup.
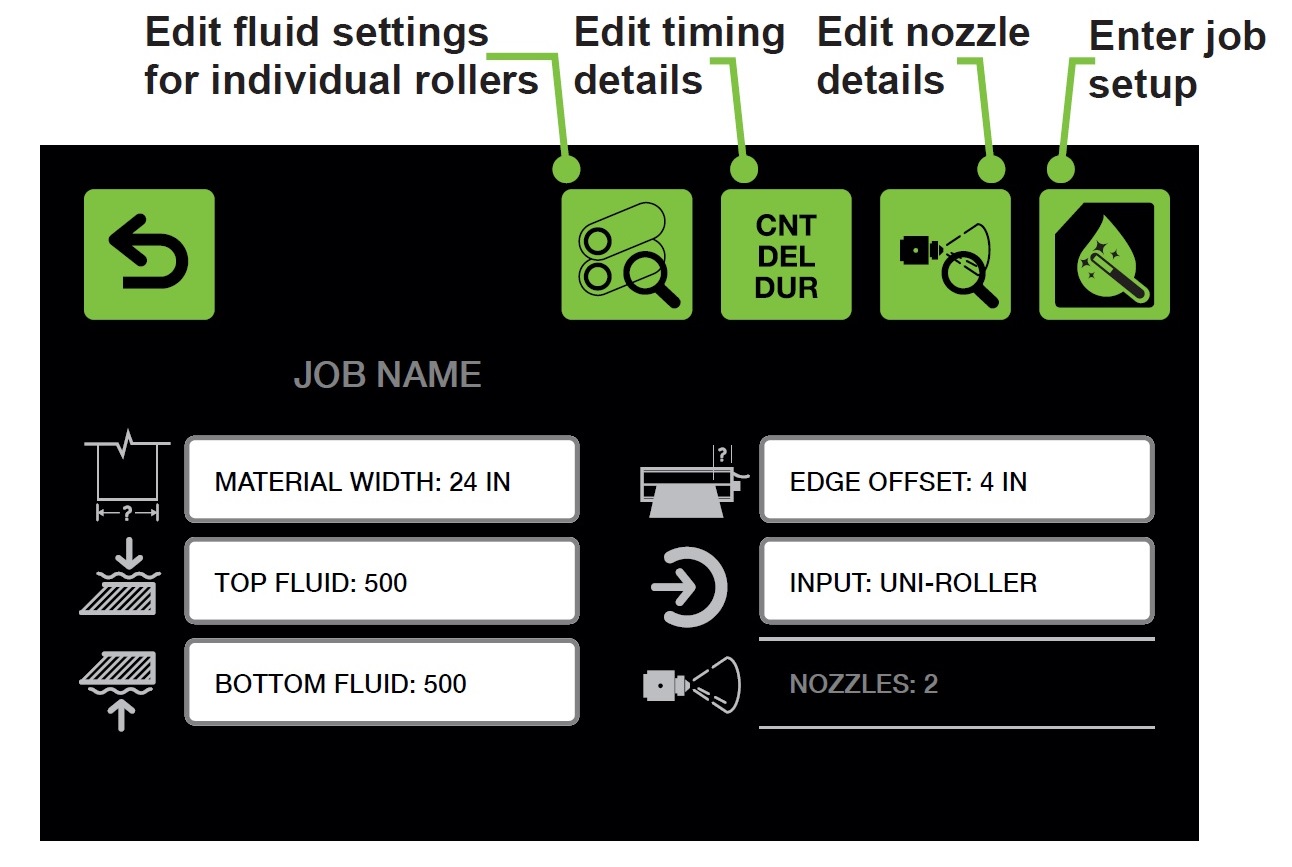
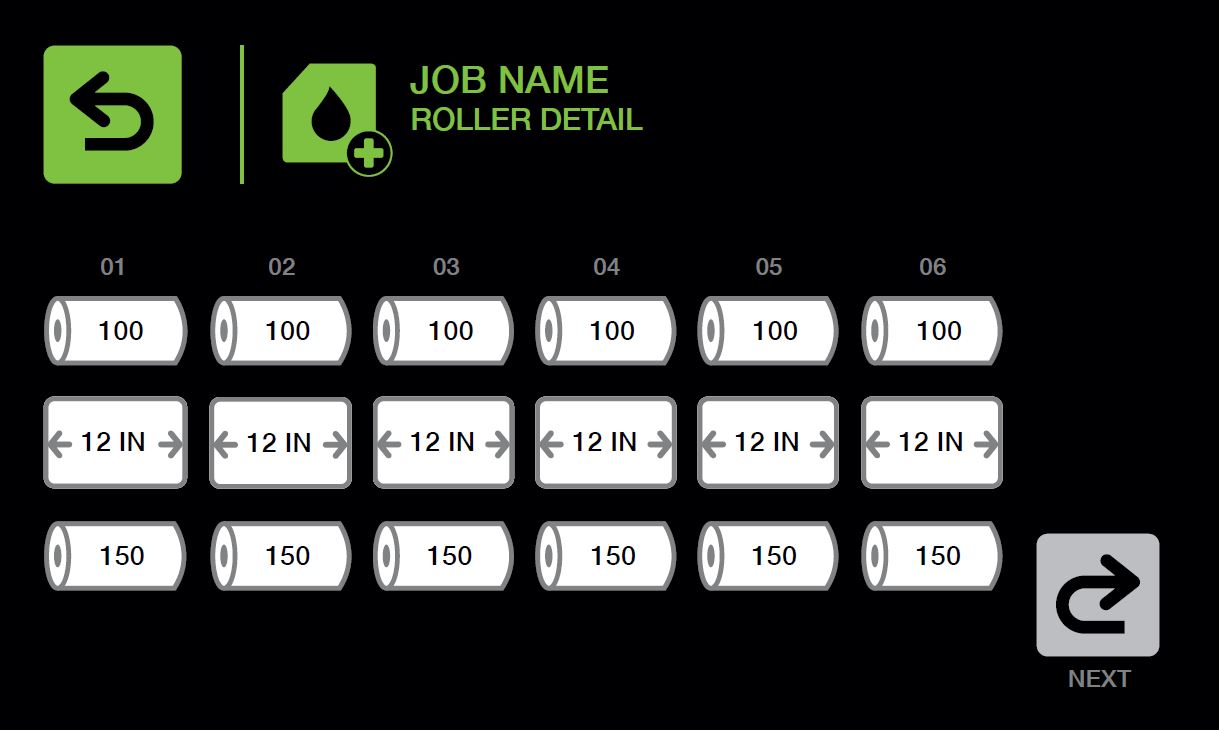
Edit Roller Fluid Settings – The user can edit the top and bottom fluid settings, as well as the material width within each roller set on the Roller Details display. Note: Changing these values will prevent the user from editing the global top and bottom fluid setting, the material width and edge offset for this job.
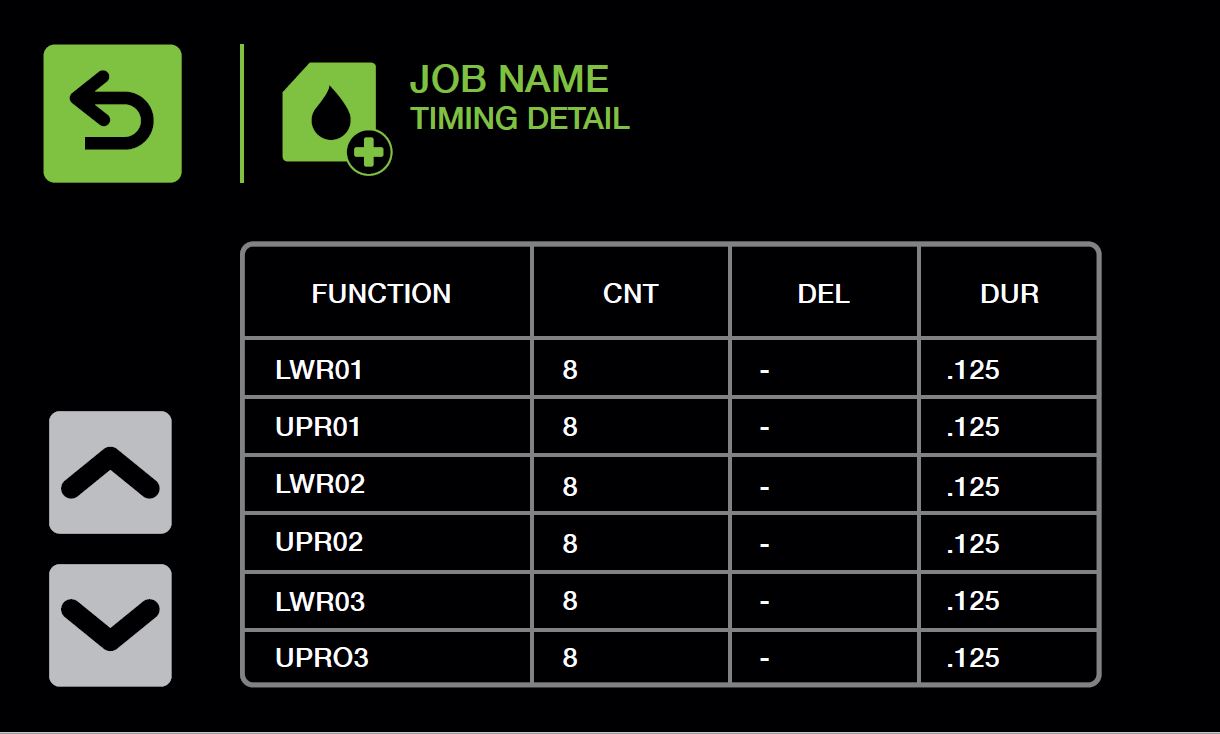
Timing Detail - The user can view the count, delay and duration values of all outputs via the Timing Details display.
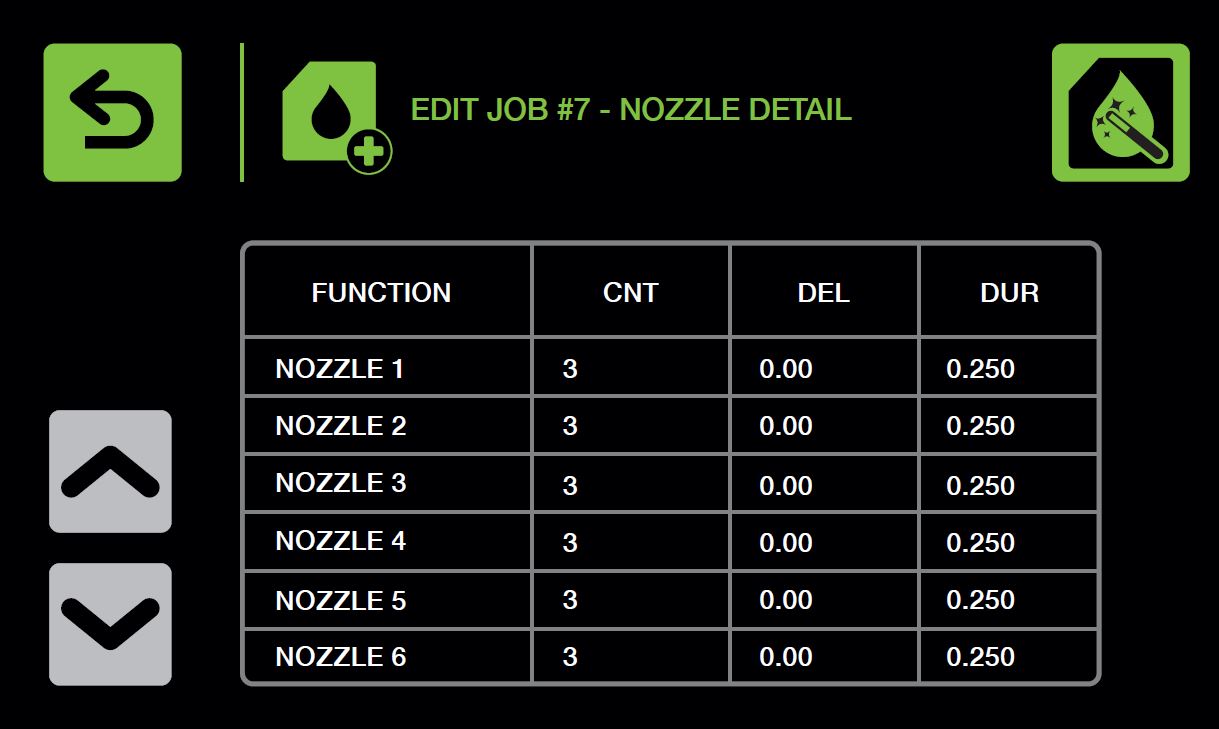
Nozzle Detail - The Nozzle Details display allows the users to view the count, delay and duration values of the nozzle outputs on the job. The user can edit the nozzle setups by pressing the JOB EDIT WIZARD button in the top right corner.
Enter Job Setup - Pressing the ENTER JOB SETUP button will bring the user to the start of the job wizard. This will give the user an opportunity to edit the job information depending on the factory and installation settings. Below are explanations of each step, although some of these may not be present depending on the system settings or the job type.
Enter Job Name: The user can enter a job name of their choosing, up to 20 characters in length.

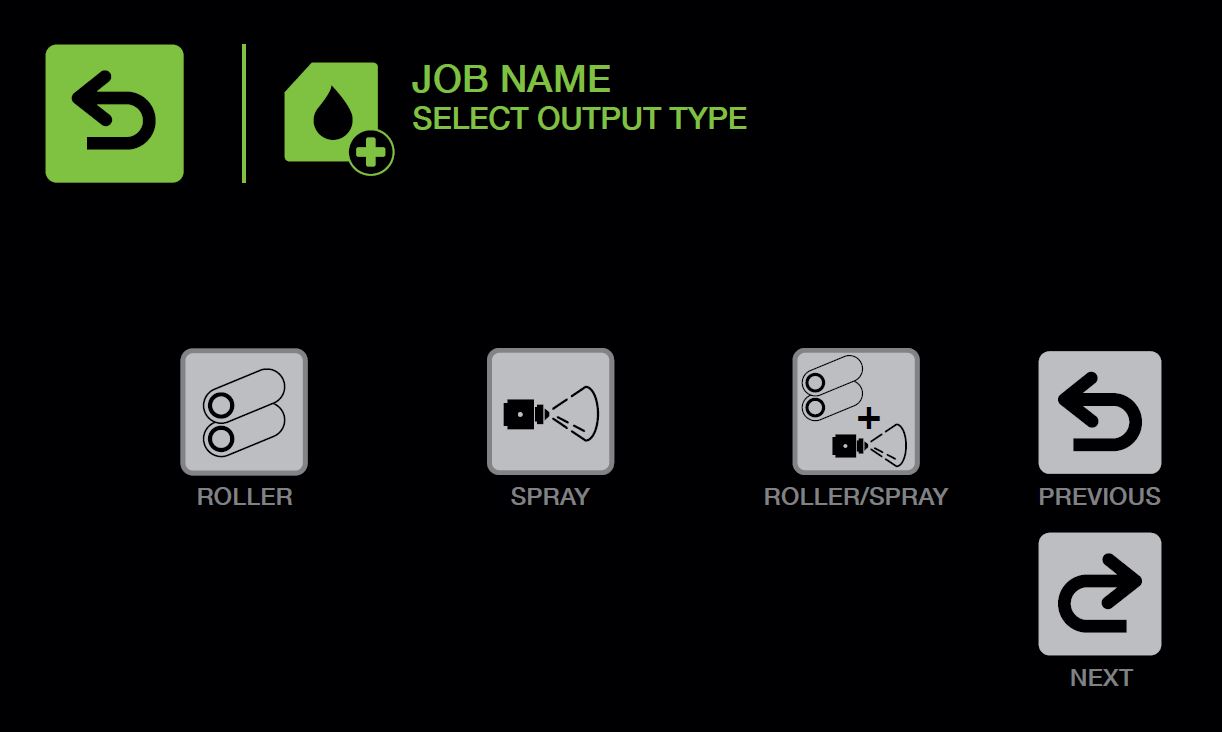
Select Output Type: Depending on the system settings, there can be up to 3 different job types:
- Roller Only: Select this if the job will only use a roller applicator.
- Spray Only: Select this if the job will only use spray nozzles.
- Roller/Spray: Select this if the job will use both a roller applicator and spray nozzles.
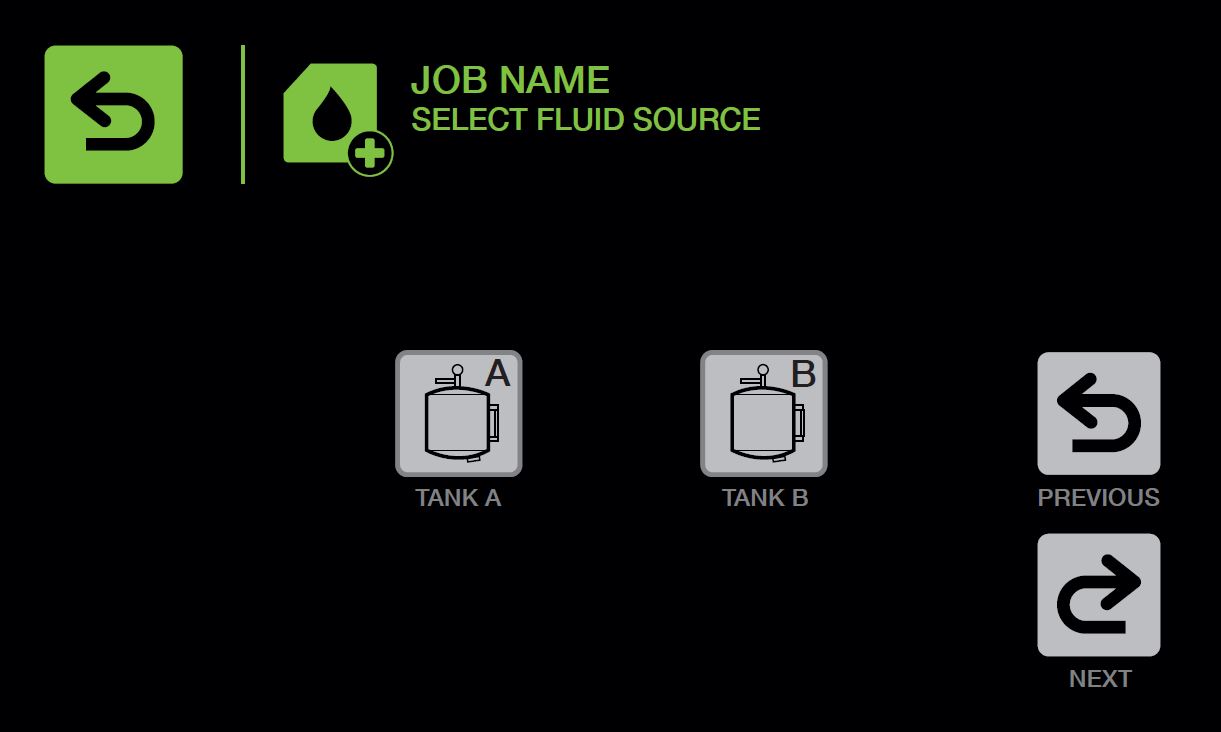
Select Fluid Source: If the system is equipped with a fluid diverter valve, the user will need to select which tank the fluid will be supplied from.
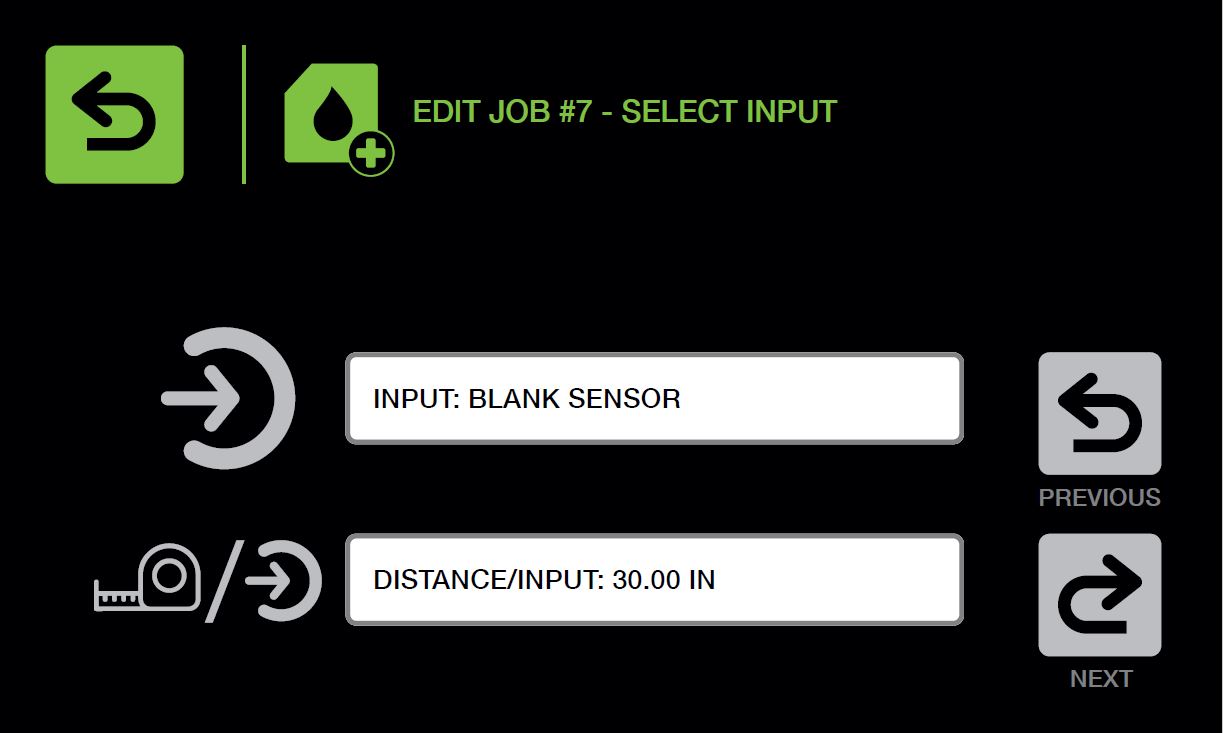
Select Input: Select the input source for the roller system. The user can scroll through the inputs by touching the white box next to the Input icon. If the input selected is a Blank Sensor, Encoder or other, the user will be required to enter the distance per input as shown below.
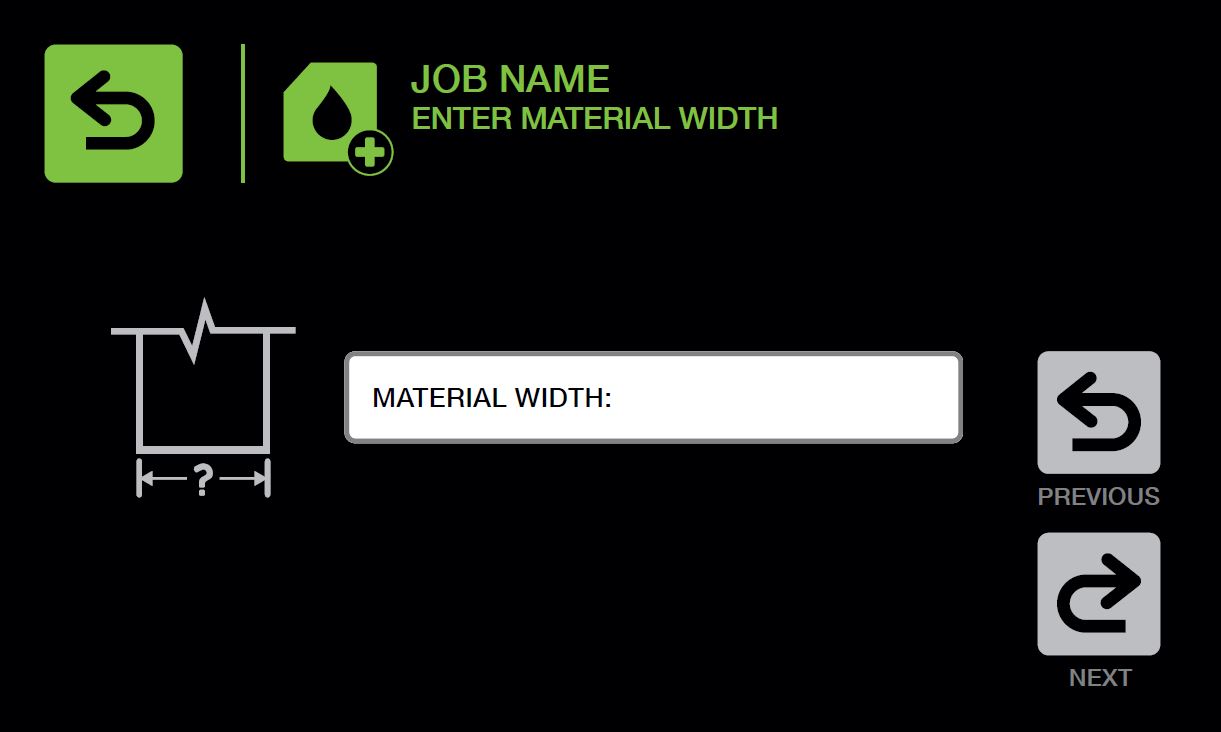
Material Width: Enter the width of the stock going through the roller applicator (in inches or centimeters, depending on the system configuration).
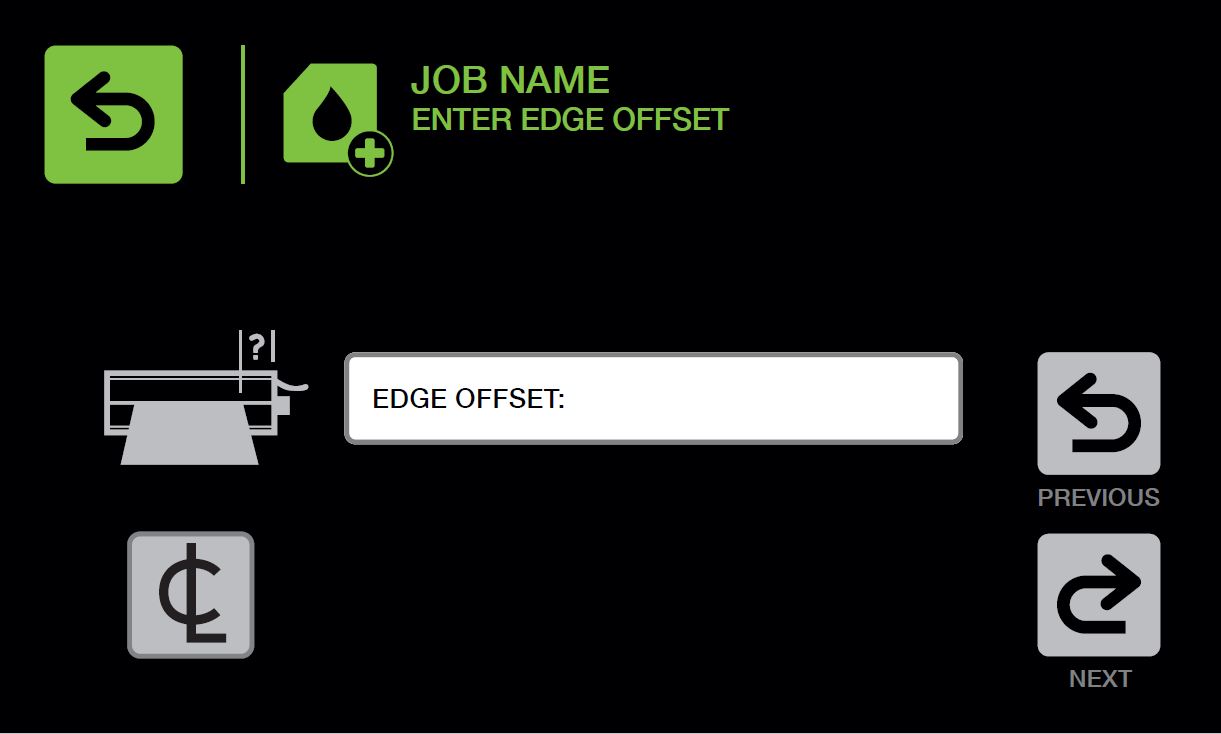
Edge Offset: Edge offset defines where the stock is aligned within the roller system. If the stock is centered, press the CENTER LINE button, otherwise measure from the inside of the endplate where the tubing bundle exits to the edge of the stock and enter that value (in inches or centimeters, depending on the system configuration).
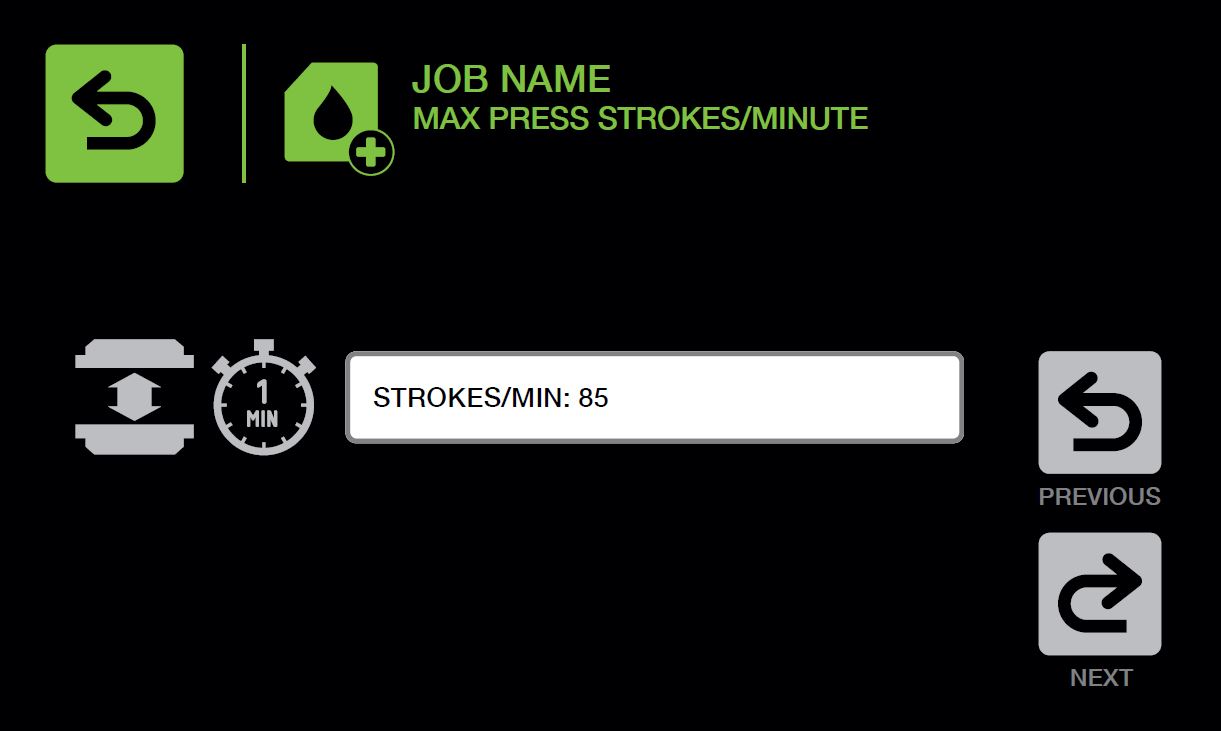
Maximum Strokes/Minute: Enter the maximum amount of strokes per minute the press will run for the job being created. Depending on the system settings, this display may prompt for the maximum inputs per minute or maxi¬mum line speed instead of the maximum press strokes per minute.
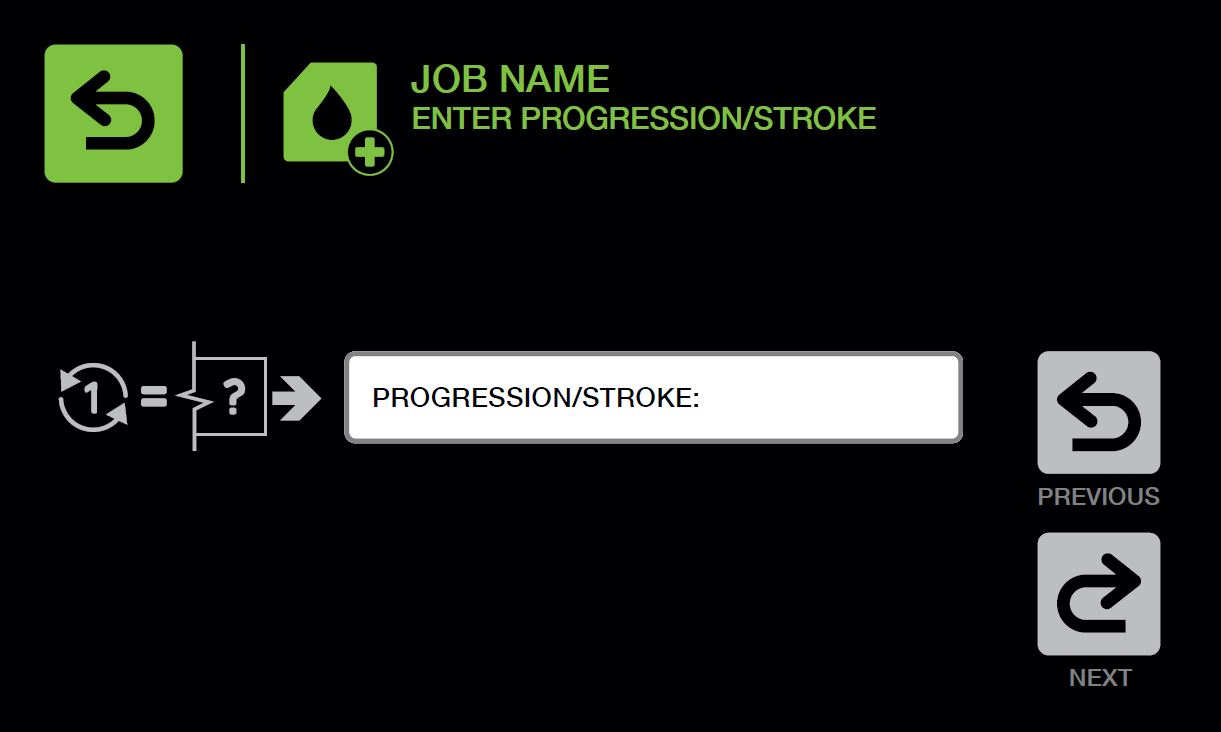
Progression/Stroke: Enter the distance the material moves every stroke of the press (in inches or centimeters, depending on the system configuration).
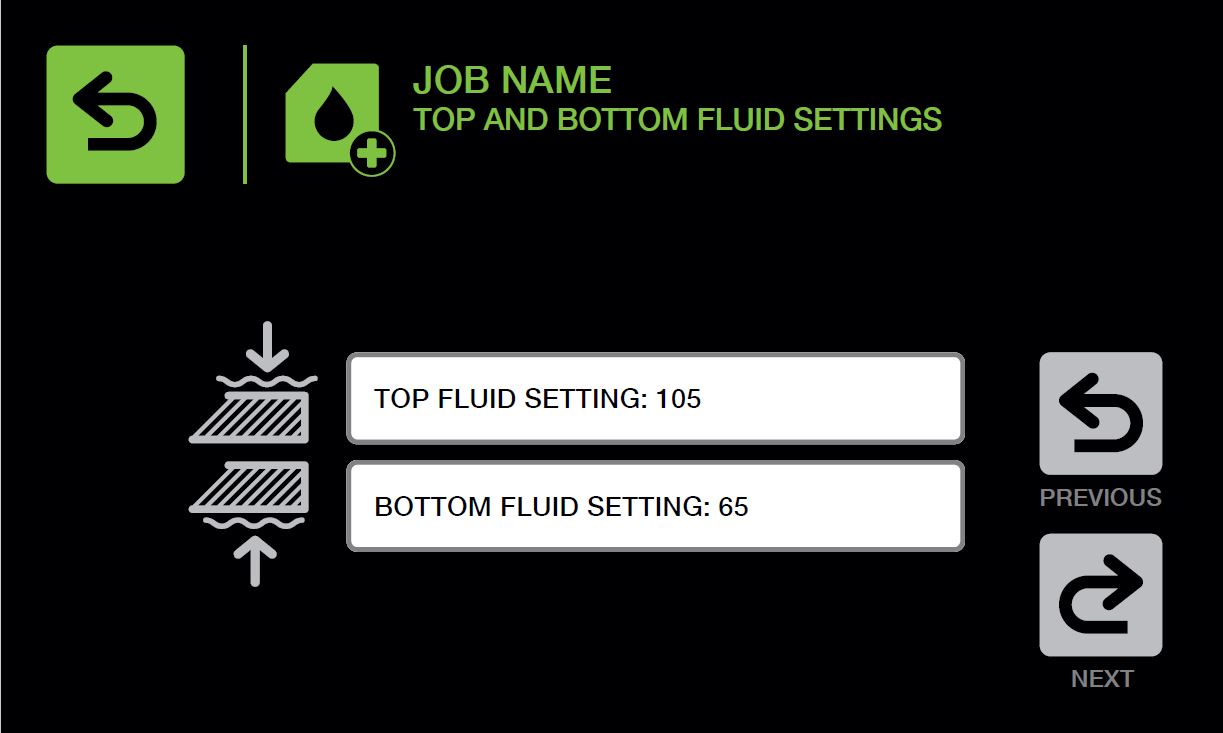
Top And Bottom Fluid Settings: Fluid settings can be adjusted from 0-1000, with 0 meaning that no fluid would be applied. A per roller adjustment can be done at the end of the job setup or in the Job Edit menu. For advanced users, the film thickness (in microns) is equal to the fluid setting divided by 100.
Nozzle Setup: The nozzle setup asks for an input, count, delay and duration. The count is the number of inputs the system needs to receive before turning on the nozzle. The delay is the time period (in seconds) the system will wait to turn on the nozzle after the counts are received. The duration is the time period (in seconds) the nozzle will spray.
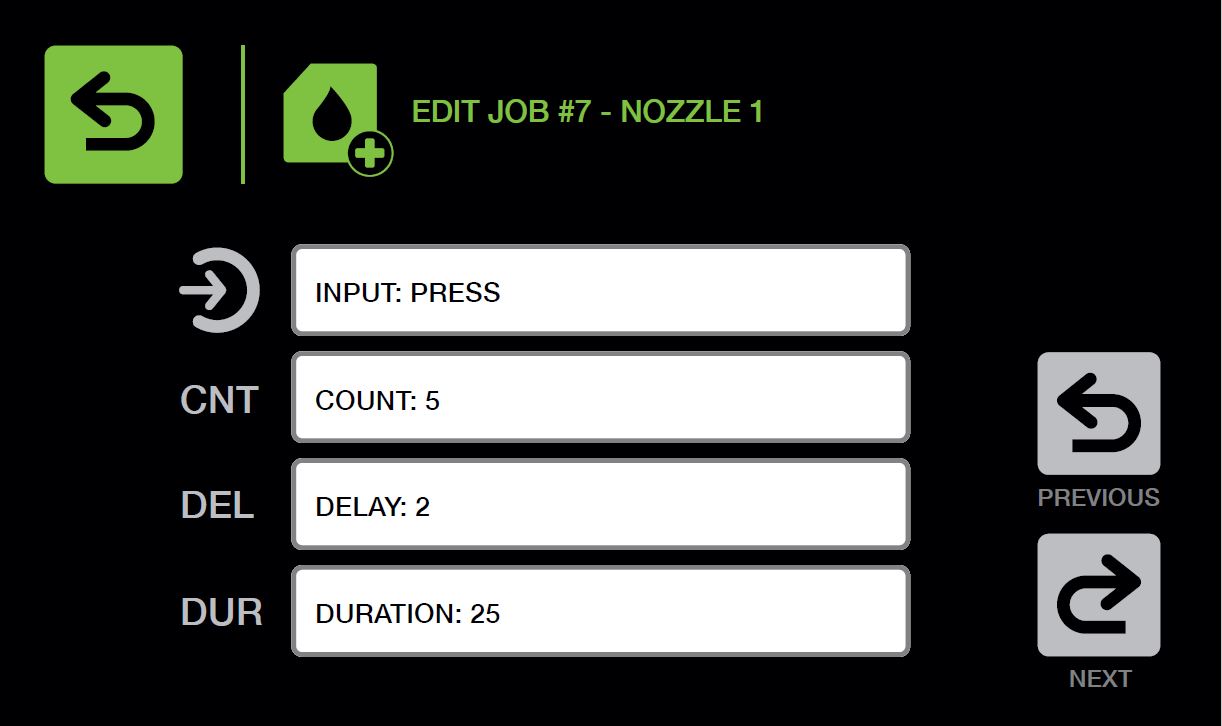
If the user selects the input as a continuous input, they will only be able to set a delay. If no delay is set, the nozzle will start spraying when the input comes on. If a delay is set, the system will wait the duration of the delay and then start spraying. Once the input turns off, the nozzle will continue to spray until the duration of the delay is complete.